Saturday, September 20, 2008
Model Progression
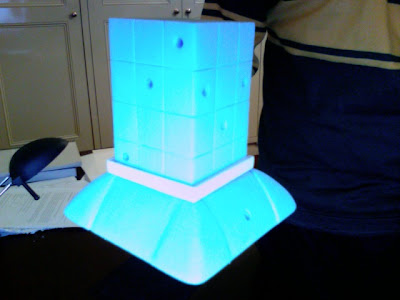
Above is a photo of my model, still need to carve out a few minor details but you get the idea with this photo.
FOAM MODEL TIP
-Something i learned at TAFE last year while doing a tolerance exercise involving blue foam.
Most of us have drawn out our shapes on bank pad paper, stuck them onto blue foam and tried to cut around the edge.....My suggestion is simple, Instead of using paper use PASTE BOARD to stencil out your shapes, and use push pins to keep it in place, so when you go to use the hot wires you can cut right to the edge as the hot wire wont cut through paste board or anything thicker. This way u get a PERFECT cut along the edge.
-Kyle
Find out: SEEK Salary Centre Are you paid what you're worth?
fatigue
foam kept breaking, could've done it with wood.
-Annie
weekly post
First attempt at soft model
MODELING TIP:
My modelling tip for tonight is to utilize colour in your model as much as possible. Its amazing how much adding a small bit of acrylic paint to your foam model to highlight areas or different surfaces helps give someone a much better idea of the products look and feel. For this to be done well the surface texture needs to be very smooth and sometimes different parts need to be painted separately. I hope this helps someone.
- Ryan
Busy Beacon = Tetrahedron
The photos below show my milling machine creating the tetrahedron. It is supported through he model via a shaft, connected to an indexing head. The indexing head allows me to rotate the tetrahedron angularly about two axis. Note: the actual body still needs to be sanded down from this basic shape, however the basic shape determines the accuracy of the final sanded form.
Hot Tip or maybe not: If you ever find yourself machining parts, within the lathe or milling machine, support the model via a common shaft or impaled item. You can therefore vice, calm ro chuck the impaled items, to position your part. However, sticking shaft or blocks into foam pieces etc. can create unwanted holes, der. As my shaft has intersected my tetrahedron, i am using the remaining hole as a design feature. Furthermore it's important to think about the manufacturing or machining process to create your design and design and refine with your manufacturing capabilities in mind.
Catch
Daniel Dobbo.
rain gauge out in saturday rain
onething i've found that has been great is to wrap sand paper around a pento sand small radius's.. which decreases the chance of the sandpapercreasing and scratching the foam. also using a serrated knife makescutting foam at home easy, or slicing small amounts off.
phoebe .L
Find out: SEEK Salary Centre Are you paid what you're worth?
Week 10
Wei-Pai
Laura
If you attempt to use the disk sander, hold on VERY tight as it may pull the model out of your hand and injure it. It is probably easier to use a rasp if the model is curved like mine.


I went with the last picture I posted. This is a desk ornament to sit on the desk in a job interview. The control side faces the interviewer and the other side; (microphones) the interviewee. The whole unit will be black and the coloured panel is the display which would only be turned on after the interviewee exists the room. This tests for levels of enthusiasm and truthfulness.
model
My tip:
For nice lines and details in your model, take a piece of sand paper and fold it in half. Then use the edge to get into the corners and dig into the foam to create some nice lines.
Play now to win prizes for you and your friends! Are you a friend magnet?
Blue Foam Modeling Tips
I guess my tip is to take it slow. i stuffed up my first attempt on the model because i did not take my time. luckily the sphere was cut into 2 halves so i have 2 attempts at making my indent. Do as much as you can with the lathe, rasp and hot wire cutter and then start sanding to get an even surface which does not split.
Joseph
Model progress...
 So ye I came in on Friday ready to lathe my model out before class becuase i knew it wouldnt take to long, as the shape is pretty simple (as seen in the pic above^). And when i got to the workshop door i saw the notice and remembered that the workshop wouldnt be open, so i went home. I was going to try making it by hand from the left over foam I had at home, but i knew that would end in a Fail, so I didnt bother.
My tip is use the lathe to make perfectly round objects because otherwise you will Fail! ...unless you spend a lot of time making it perfectly round by hand? but I think thats pretty pointless unless it cant be done on the lathe for some reason.
Marco
Modello di concentrazione
Il mio modello per il mio topico concentrazione!
Sorry must be the pizza that I have yet to eat getting me influenced here. Anyways this is my model for measuring concentration. Its rough but you get the idea (i hope). It is a bit too big for your hand unless your a gorilla, goes good around your bicep ok and I'm assuming around your ankle it would be too loose. My next model I will try and concentrate on making it from material so it clings around a person much more securely.
ora voglio maniare mia pizza
Ciao raggazze *wink wink*
_________________________________________________________________
Win a Hotmail Go-Kart to race at Bathurst. Enter today!
http://www.livelife.ninemsn.com.au/compIntro.aspx?compId=4602
Model Development

Model update
Here is my food-poisoning dipstick attached to a keyring. I made the sleeve using a heat gun to soften the plastic which could still use a little work to clean up.
tip:
When modeling with soft (read:HOT) plastic, make sure there is enough extra material so that you have enough leverage to shape the plastic. And the plastic takes a while to cool, so be patient and keep holding it in the correct form.
Sunny
Find out: SEEK Salary Centre Are you paid what you're worth?
Measuring device for Visual Appeal
in the photos i've placed a compact makeup mirror to show scale. as one of the specifications in the brief is for the product to be slim and able to fit into a pocket or hand bag.
enjoy.
kaitlin x
Play now to win prizes for you and your friends! Are you a friend magnet?
Hunger-O-Meter!
> My tip for the workshop is to call the uni on 9903 2000 and ask to be
> transferred to Mario in the design faculty and make sure he's there...
>
> cheers
>
> dan
>
Andrew van der Merwe
>sanding blue foam with water and wet and dry will give you a much smoother surface
>blue foam cannot be spray painted or primed. ever. deliberately melting a bit of exposed blue foam using these is a worse idea. it doesnt stop melting for days and if you bog over it it will pull the completely solid bog down! its pretty extreme.
>always keep your sketches in front of your model and constantly refer to them otherwise you will be tempted to change the proportions as you go and end up with something that doesnt look as good.
Andrew vdm
Initial Models + Tip
Blue Foam tip:
This one may be a little obvious to most.
For round forms, always use the lathe. although it may not seem too hard to make even the smallest of things round by hand. In reality it is not as easy as you first think. From a simple cylinder up to a really complex cylindrical based form, or even a sphere. Use the lathe. It is more effective, accurate and in most cases faster.
i hope that helps at least one person. have a great weekend guys. cya soon.
Nick C
Find great deals on eBay Net yourself a bargain
Foam models require patience!

Hey guys, I've managed to make a fair bit of progress with my foam model, but that was only after at least 3 failed attempts and much frustration. Unfortunately (for some unknown reason??) the workshop was closed on friday, so, not only did I waste time and money driving to caufield, but this also meant that I had to try and sand the main game block by hand and getting it square required a lot of patience lol. Finally though I was able to get a reasonable result.
Foam Model
MAGNETIC BLOCKS
model and tip thingy
tips, like jeff said having a square measured block to start with helps alot, focus on accuracy as soon as you can to save work at the end.
Jason T
Play now to win prizes for you and your friends! Are you a friend magnet?
Burn Patch
TIP: not sure if aneone is using acetate or any plastics but to melt it an iron is way too hot it eats through the plastic and makes a mess. I found a hair straightener on lowest heat worked well.
-Nev
modelling tip
check, double check, recheck, double check the recheck and check again.
if something can go wrong it will go wrong, if it doesn't go wrong count yourself lucky.
and another one... the fast disc sander is not 100% accurate.
when you adjust the degree back to square, use a square! zero is NOT zero that machine (it should be 0.5 degrees or something)
i have ruined a lot of models because i forgot to check :(
and another one i just remembered...
the further from the centre of the disc sander you go, the less flat your model will be, the sandpaper can start to peel up on the sides
and the larger rotation accentuates this! try to sand stuff in the middle.
this is what happens when you fail modelmaking :P (don't do it... just dont :()
Find out: SEEK Salary Centre Are you paid what you're worth?
Time Tube.
haven't had a chance to get into the workshop yet... due to other commitments and it being closed on friday...
anywho, since i don't have a model to post up, thought i'd atleast show you what my design will look like
and why it looks the way it does.
my project is based around managing/observing time, i've developed a 'time tube' device which basically displays
how much work you've done on a particular goal and how much you should have completed based on the the time till it's due date.
As per one of robbie's brilliant idea's, i decided to place four time tubes on a dumb waiter of sorts.
essentially, four (or more!?) of the tubes can be placed in this rotating stand.
The idea behind this is that you can quickly check your progress by spinning the stand and picking out any large discrepancies in progress etc.
It also theoretically joins all four tubes into one big progress meter but with four different levels of progress on the one bar.
progress levels are manually adjusted by the user (approximate) and each tube glows its own colour. the colours not only have the purpose of separating goals, they should also 'meld' together when the stand is spun creating a neat effect and hopefully develop a stronger bond between the user and time.
one last thing i'd like to ask:
how many of you have a wall, or a flat vertical surface within arms reach of your desk?
i would like the unit to be wall mounted but i'm not sure how many students actually have walls around their desk.
maybe you have yours in the middle of your room... like an island of pain.... and study...?
here's a few pictures of what i've been ranting about:
Sell your car for just $40 at CarPoint.com.au It's simple!
Cuboic TM device
this is my cuboic design for the time management device.
i think i need to change the paper that i'm using to stick on the my model.
first i have try to make my model out of the foam but it didn't look as nice as when i used wood.
and when i used the wood i can see clearly the weight and how the device sit on the table.
Tip:
if you want to make model out of wood but you don't have a right thickness, you can try to stick more than 1 wood and get the thickness that you want. But remember, make sure that the direction of the wood grain is placed differently.
-yani-
Hearing device - Model
 hi guys,
This is my final model for my "chosen concept"(not the final one of course), there is still some little details i might have to add, apart from that this is pretty much it. For the LCD screen at the back I'd tried to stick a piece of printed out paper which reflect to the reflective surface of a LCD screen (by using illustrator/ gradient fill) , however because of the round surface of my model its hard to stick a flat piece of paper down, and it might wreck the overall look of the model.
Tip:
if you have separated parts for your device design i highly recommend you to cut it out first stick it with double sided tape and then shape your desired form or shape out. This will make your life a lot more easier and also looks better.
Beichen :D
Model Progress!
This is where i'm at so far with the first model. To save time for the 1st model, ive used a simple black bonds singlet for the 'housing' of my design components (sensors, interface etc) but im intending to look for a suitable material and sew my own undergarment for the final model (or at least stitch onto an existing garment).
The half-finished model, as you can see is fairly basic at this stage, as im looking into styling it towards my specific market (both male and female office workers/wearing neat attire etc). Im planning to develop my 'Spinotech' sensors making them thinner and with some detail. The interface is yet to come!
Modeling tips:
Heres a great way to put fine details into your foam models (ie. part lines etc): 1. cut a small piece of fine wet and dry sandpaper
2. then fold the piece in half, then half again, with the grit side outside
3. use the corner edge of the sandpaper and you will have a gritty point to sand out fine grooves with several passes.
This works very well and will give a very clean sharp cut.
If you have any suggestions id love to hear them!!
Andy
oops!
- Marisa
Sell your car for just $40 at CarPoint.com.au It's simple!


